Step 3: Launching and authorizing Finale
- Double-click the “Finale” icon on your Desktop. When you launch Finale for the first time, you will see the Authorize Finale dialog box. This dialog box continues to appear each time you launch Finale until the product is authorized.
- Click Authorize Now! to start the Finale Authorization Wizard. Follow the simple instructions to authorize your copy of Finale. Or, click Remind Me Later to authorize at a later time. You have 30 days to authorize your copy of Finale. After 30 days, printing and saving are disabled until your copy of Finale is authorized.
If you have Internet access (and are not running firewall, security, or virus software that would block information from being received back at your computer), simply select this option, and the rest is taken care of automatically, after filling out the required information.
Otherwise, select one of the other options for phone, FAX, or standard mail, and a window will be displayed containing a User Code. You may print out this page and FAX or mail it to us, or you can call with your serial number and User Code. In either case, we will generate an Authorization Code that you manually type in to complete the process. In each case (including Internet), our system automatically sends an e-mail confirmation of the information. If you had selected the Internet option, but have a firewall that blocked the information from being received, then you can manually type in the Authorization Code information provided.
Your copy of Finale can be authorized on two computers simultaneously. However, with an Internet connection, authorization can be moved from one computer to another at will. Simply choose Help > Deauthorize Finale to open up a free authorization slot. Your copy of Finale can now be authorized on a different computer. Also, deauthorize prior to making hardware changes to your computer, such as replacing a hard drive. Doing so will ensure a slot is open to authorize after updating your hardware. When you deauthorize, printing and saving are disabled until authorization has been restored.
- Click OK. The Launch Window appears. From here, you can choose how you want to begin a new score, continue working on an existing project, or access reference materials. For example, choose Setup Wizard to begin a new custom document by specifying the title, staves, key signature, time signature, and other attributes. You’ll learn more about the Setup Wizard in Tutorial 1a.
IMPORTANT! The User Code and Authorization Code are computer-specific and will only work on the given computer installation. Make sure that the Authorization Code is typed in using capital letters, and also verify that the correct serial number has been entered. If you have made a change to the computer (replaced the hard drive or motherboard, or installed a new operating system), and didn’t deauthorize prior to doing so, contact Customer Service directly by phone, FAX, or standard mail with your serial number and the location ID for the specific installation in question, and one of our representatives can clear the previous authorization from your account. If the software is not "reminding" you to authorize when you run the program, then the authorization has been successfully completed.
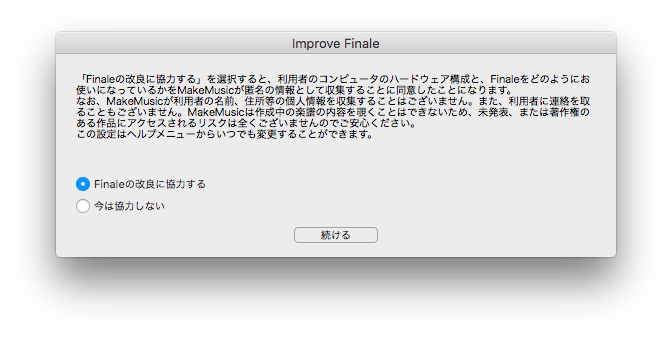
After Finale is authorized, a dialog box appears asking whether or not you want to submit anonymous usage data to MakeMusic. MakeMusic uses this data to inform the design of new versions of Finale; no personally-identifiable or document information is ever collected.

 Step 2: Setting up your MIDI system Step 2: Setting up your MIDI system
|
Step 4: The MIDI Setup dialog box
|

